[教學] 使用 Home Assistant 的 template fan 改變小米電扇於 Apple Home 中呈現的介面樣貌

小米的智能電扇在設計上蠻簡約的,雖然沒有原生 HomeKit 的支援,但透過 Home Assistant 也能輕鬆將其轉換到 Apple Home 中,透過 Siri 或是 Apple Home 的介面來控制。但是…

以我手上的兩台小米電扇來說,整合後轉到 Apple Home 中會變成這樣:

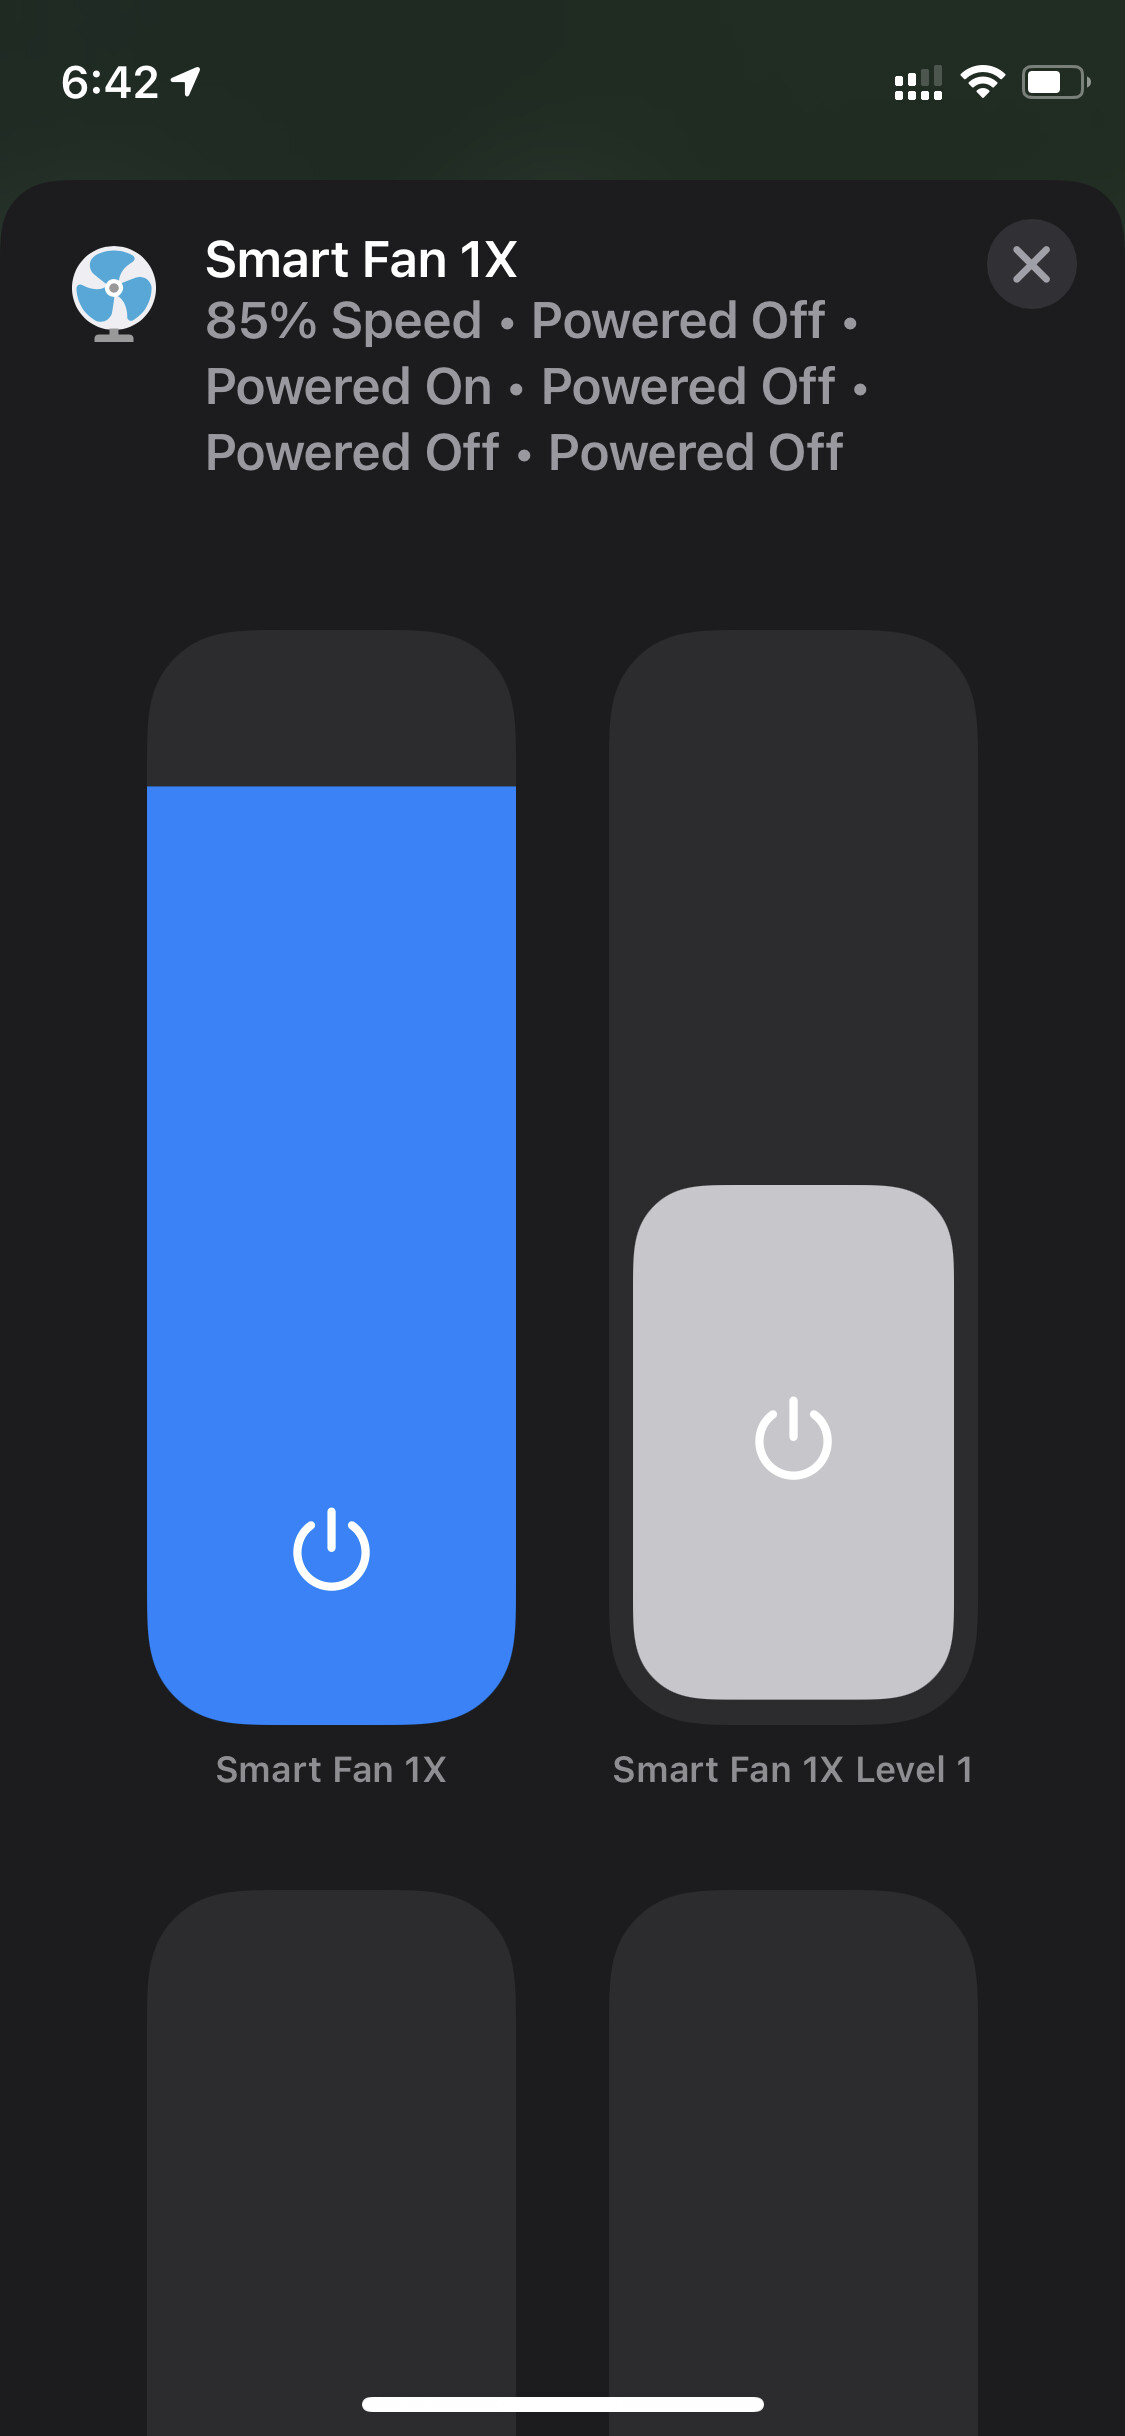
對,就是一堆開關 group 在一起。這樣阿雜的呈現方式很不符合 Apple 簡約的精神啊,我想要的是這樣:

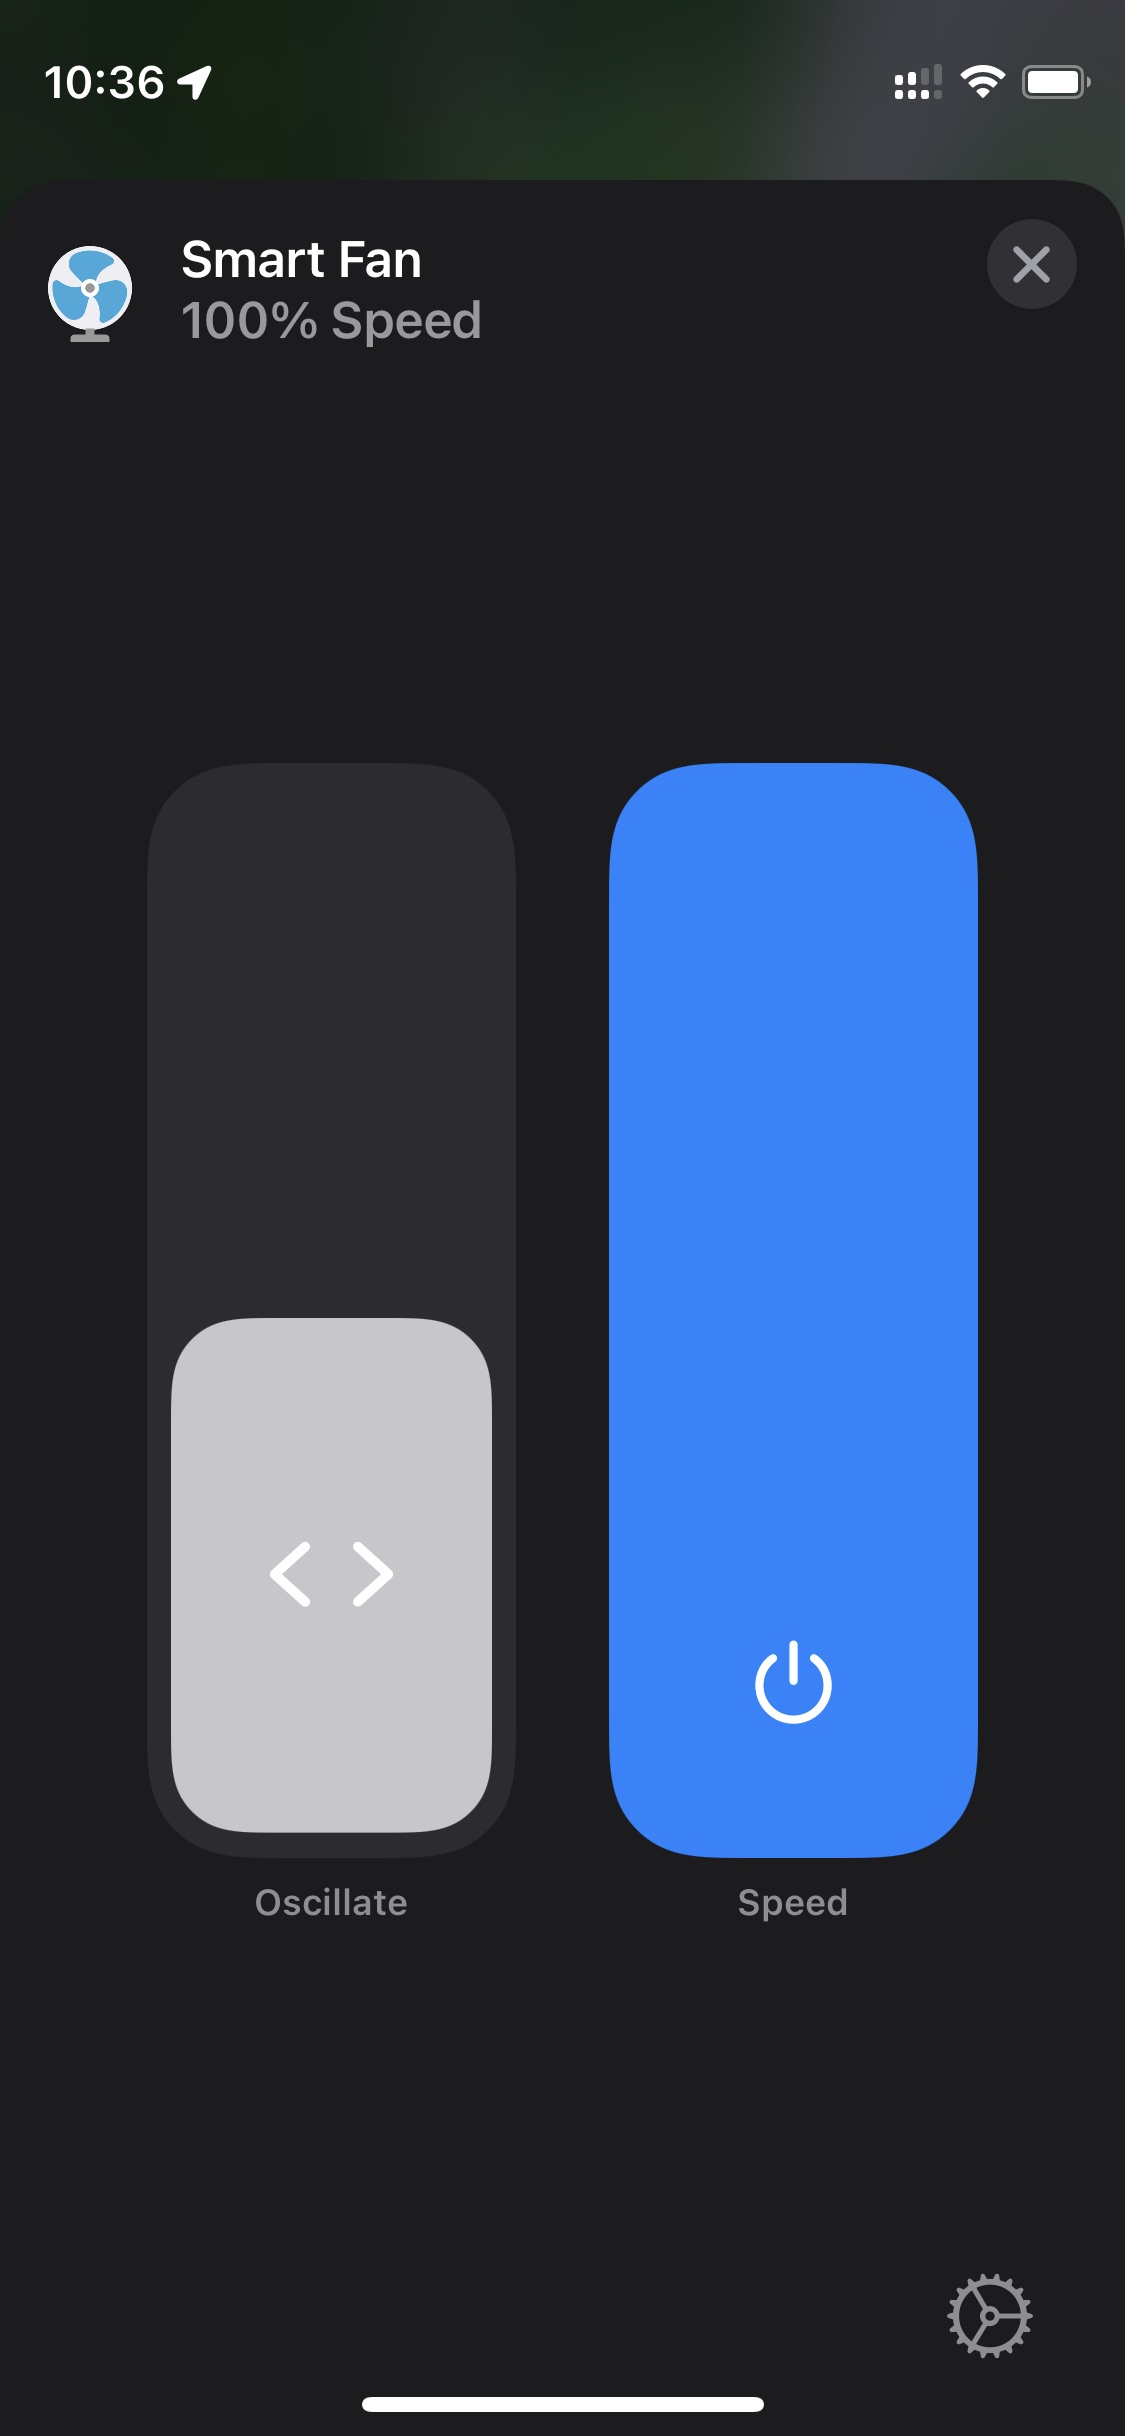
雖然沒有一堆功能,但基本的開/關、調風量、擺動等都有,不用捲動就顯示完了,看起來是不是順眼許多?

其實以前就有用過 Home Assistant 的 template fan 製作自訂的風扇介面,就是弄成這樣,所以我想到的方式就是透過 template fan 做一組虛擬風扇,但實際上這個虛擬風扇控制的是小米風扇的功能,但我轉去 Apple Home 的是用這組虛擬風扇,以達到調整介面的目的。

下面範例以小米電扇 1X 為例子,依照不同的整合方式接入到 Home Assistant 中,產生的 entities 會略有不同,請自行依照實際狀況調整。怎麼將小米電扇接入到 Home Assistant 不在本篇的範圍,就請參考網路上其他教學或在下方提問。

首先參考 Home Assistant 官方文件,先在 configuration.yaml 中建立虛擬風扇的框架:


fan:
  - platform: template
    fans:
      virtual_smart_fan:
        friendly_name: "Virtual Smart Fan"
        value_template: "{{ states('fan.smart_fan_1x') }}"
        oscillating_template: "{{ state_attr('fan.smart_fan_1x', 'oscillating') }}"
        percentage_template: "{{ state_attr('fan.smart_fan_1x', 'percentage') }}"
        turn_on:
          service: fan.turn_on
          entity_id: fan.smart_fan_1x
        turn_off:
          service: fan.turn_off
          entity_id: fan.smart_fan_1x
        set_oscillating:
          service: script.smart_fan_1x_oscillating
          data:
            oscillating: "{{ oscillating }}"
        set_percentage:
          service: script.smart_fan_1x_set_speed
          data:
            percentage: "{{ percentage }}"
        speed_count: 100

將上面的設定打完後重啟 Home Assistant,就會在 entity list 中看到新的風扇被建立出來。但是上面只是風扇的框架,我們還要實際撰寫各個功能的 script 才能讓虛擬電扇真的能控制原有的小米電扇。

首先來做擺動的控制,下面是 script.smart_fan_1x_oscillating 的內容:


alias: Smart Fan 1x Oscillating
sequence:
  - service: fan.oscillate
    target:
      entity_id: fan.smart_fan_1x
    data:
      oscillating: '{{ oscillating }}'
mode: single

基本上 {{ oscillating }} 會將虛擬風扇是否擺動的數值傳遞到 script 中,傳遞的是 true or false,因此我使用 fan.oscillate 的 service 去啟動或停止擺動的動作。

接下來我們來撰寫調速的 script。下面是 script.smart_fan_1x_set_speed 的內容:


alias: Smart Fan 1X Set Speed
sequence:
  - choose:
      - conditions:
          - condition: state
            entity_id: fan.smart_fan_1x
            state: 'off'
        sequence:
          - service: homeassistant.turn_on
            target:
              entity_id: fan.smart_fan_1x
    default: []
  - service: fan.set_percentage
    target:
      entity_id: fan.smart_fan_1x
    data:
      percentage: '{{ percentage }}'
mode: single

大概簡述一下邏輯,由於小米電扇 1X 可以支援無段調速(0~100%),因此在前面的 template fan 框架上我有下一個 speed_count: 100 的參數(意思就是從關到最大風速可以有幾階段的調節可能),像我另一台比較早買的小米電扇只有四段,這邊就要依照實際狀況調整。

同樣的,{{ percentage }} 會將虛擬裝置上調速的數值傳遞進來 script,因此我這邊使用 fan.set_percentage 的 service 來送出風扇速度的調整指令。

那可能有人會覺得很奇怪,為何我上面要用 homeassistant.turn_on 這個 service 來開啟風扇呢?其實原先我是沒有下這個 service 的,但會發現如果我在 Apple Home 中把風扇關掉,然後到內頁調整風速的話,風扇不會被啟動,造成介面的反應與預期的反應不符。

所以我在每次調速前先檢查電扇是否是開啟的狀態,如果不是就多補送一個開啟風扇的動作來解決這個問題。原本完全忘記 script 也有 condition 可以設,經 Eason 提醒才想起來,真的要多吃點銀杏了。(謝謝 Eason)

Home Assistant 官方文件中對於 template device 的敘述個人覺得其實有些不足,很多應用上的問題都是靠大量閱讀討論以及自己實驗才慢慢搞清楚,希望這篇教學能稍微降低一點學習門檻,如果我有理解錯誤的地方,請再指正一下,因為自己的理解不一定是正確的,以上。

9個讚

感謝 E大分享!

補充~ 最後面的電源判斷的部份可以考慮新增一個檢查 state 的 script:

fan_state_on:
  sequence:
    - condition: state
        entity_id: fan.xiaomi_smart_fan
        state: 'off'
    - service: homeassistant.turn_on
      data:
      entity_id: fan.xiaomi_smart_fan
  mode: single

Set Speed 的腳本會變成下面這樣:

fan_set_speed:
  sequence:
    - service: script.fan_state_on    #!<<< 修改的地方
    - service: fan.set_percentage
      target:
        entity_id: fan.xiaomi_smart_fan
      data:
        percentage: "{{ percentage }}"
  mode: single

最後完整的設定如下:

fan:
  - platform: xiaomi_miio_fan
    name: "Xiaomi Smart Fan"
    host: 
    token: 
  - platform: template
    fans:
      pedestal_fan:
        friendly_name: "小米電風扇 1X"
        value_template: "{{ states('fan.xiaomi_smart_fan') }}"
        oscillating_template: "{{ state_attr('fan.xiaomi_smart_fan', 'oscillating') }}"
        percentage_template: "{{ state_attr('fan.xiaomi_smart_fan', 'percentage') }}"
        turn_on:
          service: fan.turn_on
          entity_id: fan.xiaomi_smart_fan
        turn_off:
          service: fan.turn_off
          entity_id: fan.xiaomi_smart_fan
        set_oscillating:
          service: script.fan_oscillating
          data:
            oscillating: "{{ oscillating }}"
        set_percentage:
          service: script.fan_set_speed
          data:
            percentage: "{{ percentage }}"
        speed_count: 100
        
script:
    fan_state_on:
      sequence:
        - condition: state
          entity_id: fan.xiaomi_smart_fan
          state: 'off'
        - service: homeassistant.turn_on
          data:
            entity_id: fan.xiaomi_smart_fan
      mode: single
    fan_oscillating:
      sequence:
        - service: fan.oscillate
          target:
            entity_id: fan.xiaomi_smart_fan
          data:
            oscillating: "{{ oscillating }}"
      mode: single
    fan_set_speed:
      sequence:
        - service: script.fan_state_on
        - service: fan.set_percentage
          target:
            entity_id: fan.xiaomi_smart_fan
          data:
            percentage: "{{ percentage }}"
      mode: single

參考: Help with Script checking state before triggering - Configuration - Home Assistant Community (home-assistant.io)

3個讚

我應該是暈了,完全忘了 script 也可以設定 condition(我連試都沒試 XD)。

我改寫了一下使用 choose,這樣就不用多建立一個 script:


alias: Smart Fan 1X Set Speed
sequence:
  - choose:
      - conditions:
          - condition: state
            entity_id: fan.smart_fan_1x
            state: 'off'
        sequence:
          - service: homeassistant.turn_on
            target:
              entity_id: fan.smart_fan_1x
    default: []
  - service: fan.set_percentage
    target:
      entity_id: fan.smart_fan_1x
    data:
      percentage: '{{ percentage }}'
mode: single

謝謝!

4個讚

感謝兩位E大的教學,雖然我還搞不太懂,但照抄也成功了

1個讚

大大們佛心,特別把需要改的地方標出來,之前特別標記,我嘗試好多次才成功啊

1個讚

謝謝E大詳細的教學

1個讚