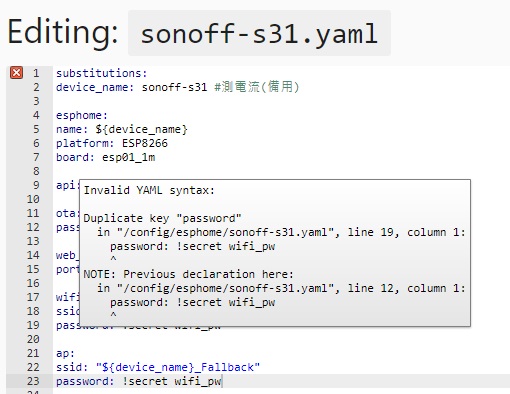
前言: sonoff s31是我很喜歡的測電量電流插座,只要會淘寶,取得的成本不用台幣200塊,幾個步驟簡單刷機,不用花五百八百去買人家刷好的
工具: usb轉ttl模塊(參考購買地址)、小鱷魚夾(參考購買地址)、ESPHome-Flasher-1.4.0-Windows-x64.exe
yaml範例(2025/4/1更新):
substitutions:
  device_name: s31abc #自己取名

esphome:
  name: ${device_name}

esp8266:
  board: esp01_1m

api:

ota:
  platform: esphome
  password: !secret wifi_pw

web_server:
  port: 80

wifi:
  ssid: !secret wifi_ssid
  password: !secret wifi_pw
  #manual_ip: #我的習慣是固定IP, 大部分人可能不要所以#標註掉
  #  static_ip: 192.168.xxx.yyy
  #  gateway: 192.168.xxx.zzz
  #  subnet: 255.255.255.0
  ap:
    ssid: "${device_name}_Fallback"
    password: !secret wifi_pw

captive_portal:

logger:
  baud_rate: 0 # (UART logging interferes with cse7766)

time:
  - platform: homeassistant
    id: homeassistant_time

uart:
  rx_pin: RX
  baud_rate: 4800
  parity: EVEN

binary_sensor:
  - platform: gpio
    pin:
      number: GPIO0
      mode: INPUT_PULLUP
      inverted: True
    name: "${device_name} Button"
    on_press:
      - switch.toggle: relay
  - platform: status
    name: "${device_name} Status"

sensor:
  - platform: wifi_signal
    name: "${device_name} WiFi Signal"
    update_interval: 60s

  - platform: cse7766
    current:
      name: "${device_name} Current"
      id: current
      accuracy_decimals: 2
      unit_of_measurement: A
      filters:
        - sliding_window_moving_average:
            window_size: 3
            send_every: 2
    voltage:
      name: "${device_name} Voltage"
      unit_of_measurement: V
      accuracy_decimals: 1
    power:
      name: "${device_name} Wattage"
      unit_of_measurement: W
      accuracy_decimals: 1
      id: "wattage"

  - platform: total_daily_energy
    name: "${device_name} Total Daily Energy"
    power_id: "wattage"
    filters:
      # Multiplication factor from W to kW is 0.001
      - multiply: 0.001
    unit_of_measurement: kWh
#################################
#SLOW SENSORS FOR HOME ASSISTANT#
#################################
  - platform: template
    name: "current_${device_name}_slow"
    lambda: |-
      if (id(current).state) {
        return (id(current).state);
      } else {
        return 0;
      }
    unit_of_measurement: A
    icon: "mdi:alpha-a-circle"
    update_interval: 60s

  - platform: uptime
    id: uptime_sensor
    internal: True
    on_raw_value:
      then:
        - text_sensor.template.publish:
            id: uptime_human
            state: !lambda |-
              int seconds = round(id(uptime_sensor).raw_state);
              int days = seconds / (24 * 3600);
              seconds = seconds % (24 * 3600);
              int hours = seconds / 3600;
              seconds = seconds % 3600;
              int minutes = seconds /  60;
              seconds = seconds % 60;
              return (
                (days ? to_string(days) + "d " : "") +
                (hours ? to_string(hours) + "h " : "") +
                (minutes ? to_string(minutes) + "m " : "") +
                (to_string(seconds) + "s")
              ).c_str();

text_sensor:
  - platform: template
    name: $device_name Uptime
    id: uptime_human
    icon: mdi:clock-start

switch:
  - platform: gpio
    name: "${device_name} Relay"
    icon: mdi:power-socket-us
    pin: GPIO12
    id: relay
    restore_mode: always_on

  - platform: restart
    name: "${device_name} Restart"

output:
  - platform: esp8266_pwm
    id: blueLED
    pin: GPIO13
    inverted: True

light:
  - platform: monochromatic
    name: "${device_name}_blueLED"
    output: blueLED
    id: led

interval:
  - interval: 60s
    then:
      if:
        condition:
          wifi.connected:
        then:
          - light.turn_on:
              id: led
        else:
          - light.turn_on:
              id: led
              flash_length : 1s
影片: 由於手機錄影拍螢幕畫面很糊,所以最後看著燒錄程式跑過程的畫面就省略了。
https://www.youtube.com/watch?v=5ggUrlfPF64
就那麼簡單,另一個簡單到一直不好意思分享的東西,打完收工。
