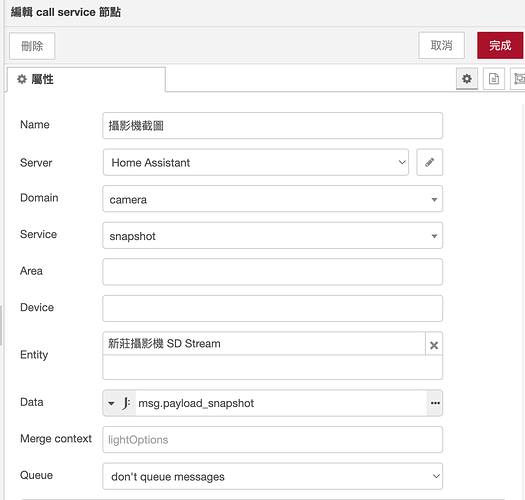
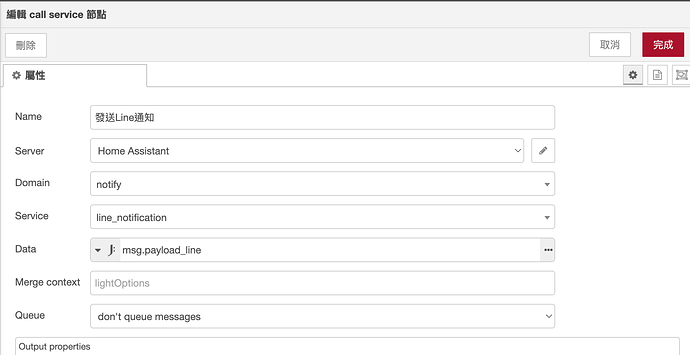
很多人都希望能將攝影機的截圖傳到Line上
而且應該都參考過Dcard上那篇文章而被勸退
#教學 打造你的智慧家庭吧! HA 串接 Line 推播通知
今天分享一個簡單的方式可以取得Token並且在NR上應用
前置作業
- HACS安裝HA-Line-Notify GitHub連結如下
HA-Line-Notify
安裝說明請詳閱作者內容
2.在取得Line Token之前先在你的Line建立一個群組作為跟Line Notify連結使用
- 取得Line Token
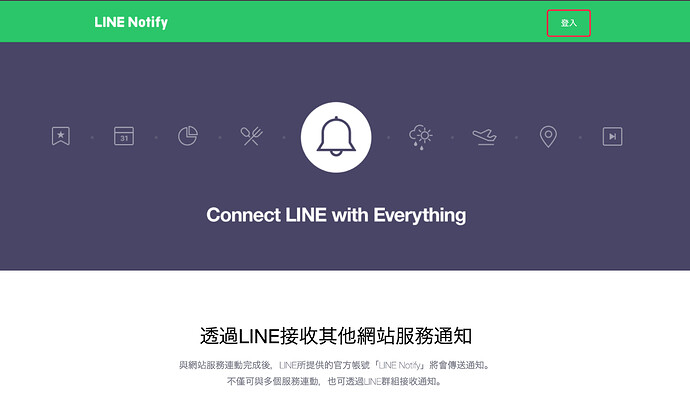
先前往Line Notify官網
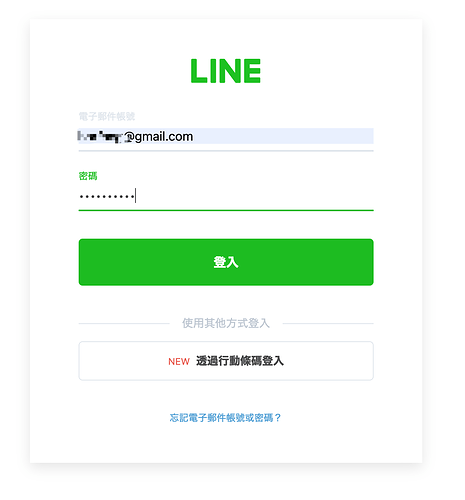
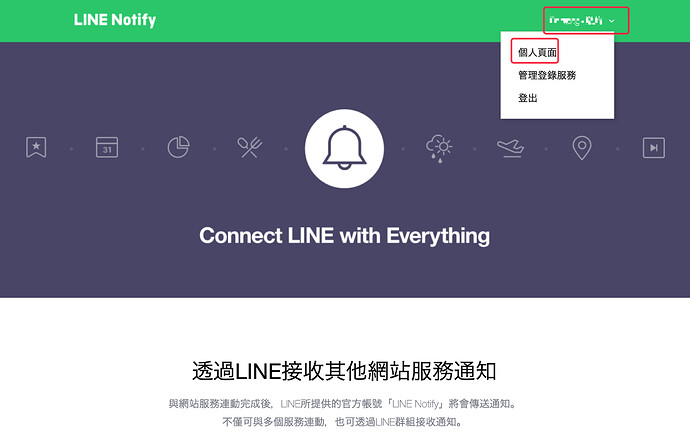
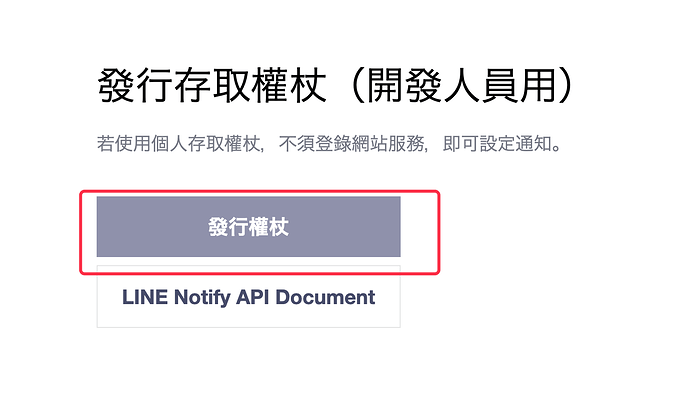
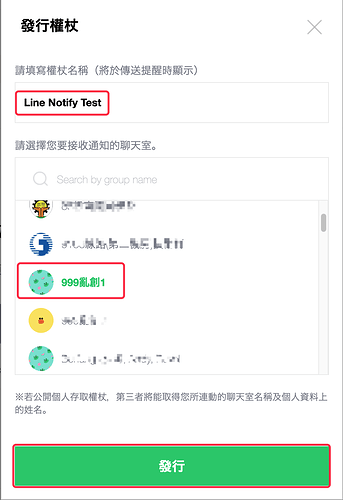
依照片順序完成Token申請
登入你的Line 帳密
登入後右上角選擇 個人頁面
拉到最下面選擇發行權杖
輸入你要在Line Notify 發送訊息顯示的名稱 選好剛剛創的群組 然後發行
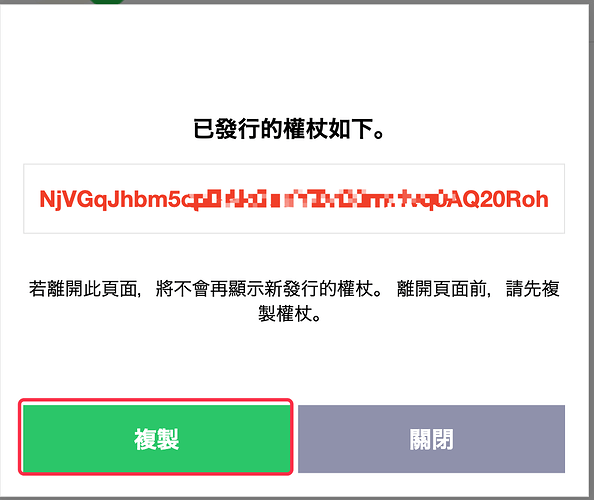
將產出的Token複製下來
注意一定要先複製下來再關閉此視窗不然就要重新申請
注意一定要先複製下來再關閉此視窗不然就要重新申請
注意一定要先複製下來再關閉此視窗不然就要重新申請
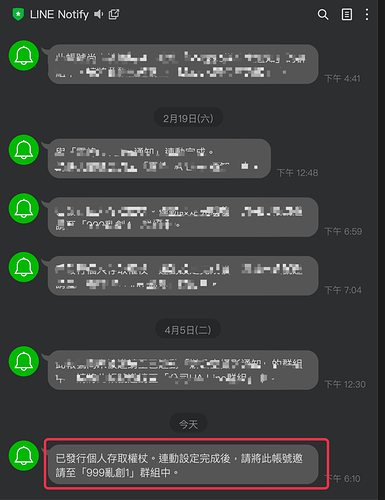
申請完Token即會在Line Notify的訊息裡面看到通知
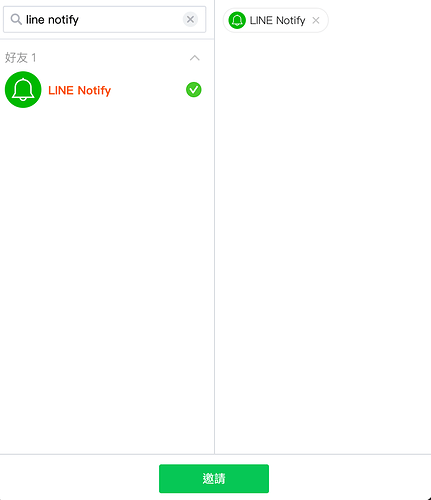
再將Line Notify邀請加入你要傳送訊息的那個群組裡面
- 依照HA-Line-Notify上的內容將
notify:
  - name: line_notification
    platform: notify_line
    access_token: 'PASTE_YOUR_PERSONAL_TOKEN_HERE'
加入你的configruaction.yaml或者是packages裡面都可以
加好以後重開HA讓設定生效
再來就可以我們今天的主要作業了
函數內容
var TimeNow= new Date();
var yyyy = TimeNow.getFullYear()
var MM = (TimeNow.getMonth()+1<10 ? '0' : '')+(TimeNow.getMonth()+1);
var dd = (TimeNow.getDate()<10 ? '0' : '')+TimeNow.getDate();
var h = (TimeNow.getHours()<10 ? '0' : '')+TimeNow.getHours();
var m = (TimeNow.getMinutes()<10 ? '0' : '')+TimeNow.getMinutes();
var s = (TimeNow.getSeconds()<10 ? '0' : '')+TimeNow.getSeconds();
var ms = (TimeNow.getMilliseconds()<10 ? '0' : '')+TimeNow.getMilliseconds();
var date = '_'+yyyy+'_'+MM+'_'+dd+'_'+h+'_'+m+'_'+s;
msg.payload_line = {"data": {"file": "/config/www/image/snapshot"+date+".jpg"},"message": date+"要在Line出現的內容"};
msg.payload_snapshot ={
   "filename":"/config/www/image/snapshot"+date+".jpg"
};
return msg;
完整NR Flow
[{"id":"fae55862b07c7d27","type":"function","z":"a02f08d2.bba848","name":"","func":"var TimeNow= new Date();\nvar yyyy = TimeNow.getFullYear()\nvar MM = (TimeNow.getMonth()+1<10 ? '0' : '')+(TimeNow.getMonth()+1);\nvar dd = (TimeNow.getDate()<10 ? '0' : '')+TimeNow.getDate();\nvar h = (TimeNow.getHours()<10 ? '0' : '')+TimeNow.getHours();\nvar m = (TimeNow.getMinutes()<10 ? '0' : '')+TimeNow.getMinutes();\nvar s = (TimeNow.getSeconds()<10 ? '0' : '')+TimeNow.getSeconds(); \nvar ms = (TimeNow.getMilliseconds()<10 ? '0' : '')+TimeNow.getMilliseconds(); \nvar date = '_'+yyyy+'_'+MM+'_'+dd+'_'+h+'_'+m+'_'+s;\nvar date2 = yyyy+'/'+MM+'/'+dd+' '+h+':'+m+':'+s+'.'+ms;\nmsg.payload_line = {\"data\": {\"file\": \"/config/www/image/snapshot\"+date+\".jpg\"},\"message\": date2+\"宿舍攝影機偵測到移動!\"};\nmsg.payload_snapshot ={\n \"filename\":\"/config/www/image/snapshot\"+date+\".jpg\"\n};\nreturn msg;\n","outputs":1,"noerr":0,"initialize":"","finalize":"","libs":[],"x":550,"y":560,"wires":[["e9031be6b6bb5d33"]]},{"id":"e9031be6b6bb5d33","type":"api-call-service","z":"a02f08d2.bba848","name":"攝影機截圖","server":"91a78be.0d63e78","version":5,"debugenabled":false,"domain":"camera","service":"snapshot","areaId":[],"deviceId":[],"entityId":["camera.xin_zhuang_she_ying_ji_sd"],"data":"msg.payload_snapshot","dataType":"jsonata","mergeContext":"","mustacheAltTags":false,"outputProperties":[],"queue":"none","x":690,"y":560,"wires":[["9cbc4601d0ceb8ea"]]},{"id":"9cbc4601d0ceb8ea","type":"api-call-service","z":"a02f08d2.bba848","name":"發送Line通知","server":"91a78be.0d63e78","version":5,"debugenabled":false,"domain":"notify","service":"line_notification","areaId":[],"deviceId":[],"entityId":[],"data":"msg.payload_line","dataType":"jsonata","mergeContext":"","mustacheAltTags":false,"outputProperties":[],"queue":"none","x":850,"y":540,"wires":[[]]},{"id":"91a78be.0d63e78","type":"server","name":"Home Assistant","version":4,"addon":true,"rejectUnauthorizedCerts":true,"ha_boolean":"y|yes|true|on|home|open","connectionDelay":true,"cacheJson":true,"heartbeat":false,"heartbeatInterval":"30","areaSelector":"friendlyName","deviceSelector":"friendlyName","entitySelector":"friendlyName","statusSeparator":"at: ","statusYear":"hidden","statusMonth":"short","statusDay":"numeric","statusHourCycle":"h23","statusTimeFormat":"h:m"}]
老規矩匯入後請選擇自己的實體ID更改
以上為今天分享的內容希望能幫到有需要的朋友!
