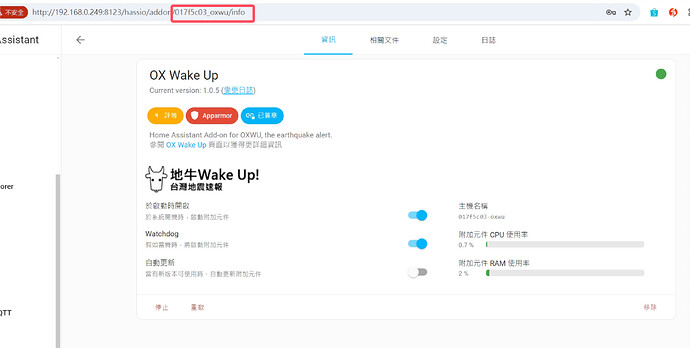
前陣子洋蔥大寫了地牛addon
但是很多人卡在要怎麼設定傳截圖
趁我還在印擠出機的外殼來弄個分享
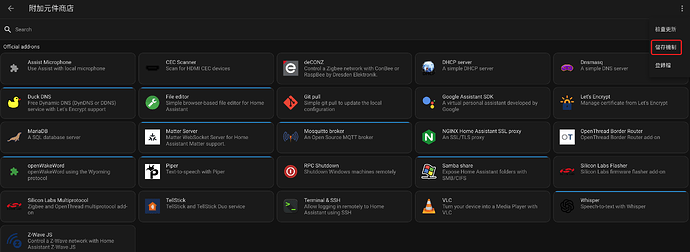
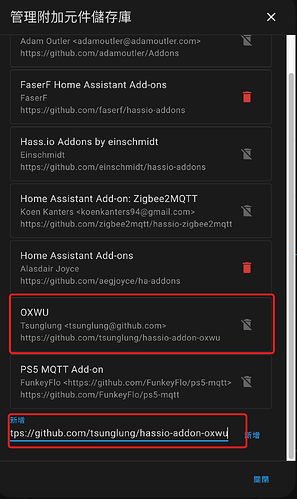
請到系統 附加元件 附加元件商店 右上角三個點 儲存機制添加rep
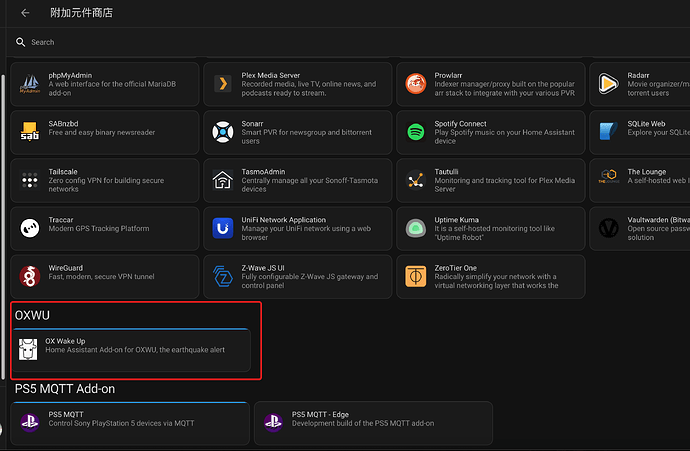
添加完畢後即可以在附加元件商店找到oxwu進行安裝
安裝過程就跳過自行安裝
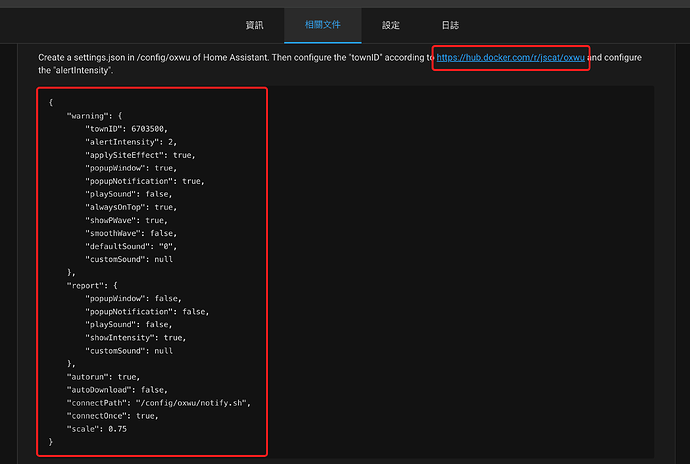
安裝完後到相關文件這邊
先點第一個紅匡的連結等等會用到
然後將第二個紅匡內的設定資料複製下來
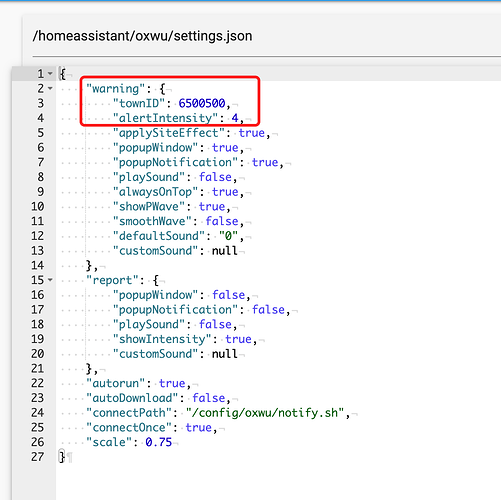
存到/config/oxwu/settings.json
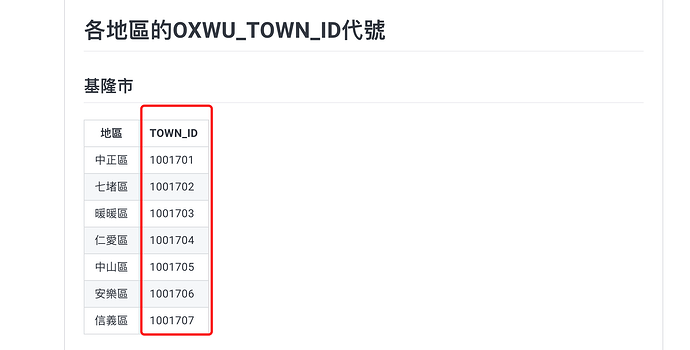
然後到剛剛點開的連結往下拉找到你要設定的區域
記下townID將settings.json裡面的townID替換成你要的
alertIntensity 這邊是設定你預設要幾級告警 預設是2但是會很吵
我是習慣4級才通知 所以我設4
然後就可以存擋離開
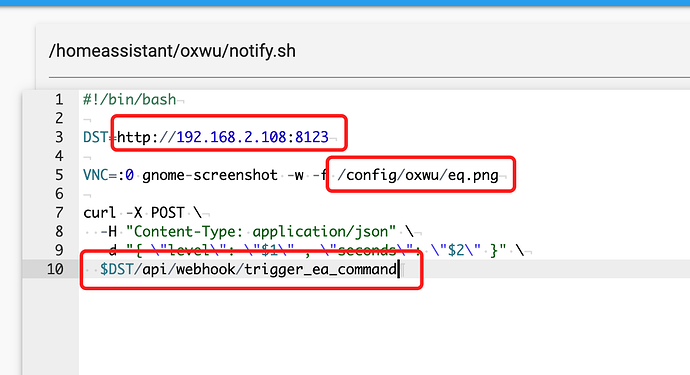
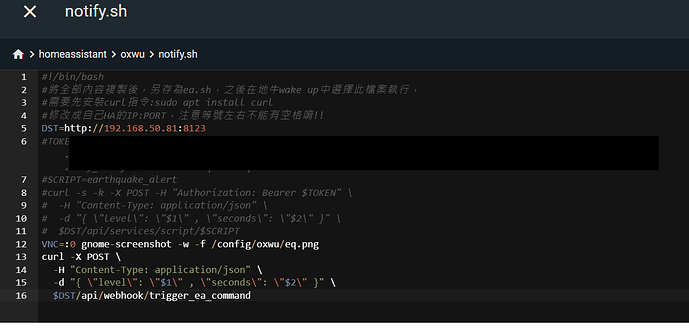
新增第二個檔案 notify.sh
#!/bin/bash

DST=http://HA IP:8123

VNC=:0 gnome-screenshot -w -f /config/oxwu/eq.png

curl -X POST \
  -H "Content-Type: application/json" \
  -d "{ \"level\": \"$1\" , \"seconds\": \"$2\" }" \
  $DST/api/webhook/trigger_ea_command
將上面的內容複製貼上
DST裡面的內容改成你的HA IP
VNC=:0 gnome-screenshot -w -f /config/oxwu/eq.png
這行最後面是存放的路徑也可以改成你自己喜歡的位置
$DST/api/webhook/trigger_ea_command
這行裡面的 trigger_ea_command 是要讓自動化呼叫用的等等自動化裡面要相對應
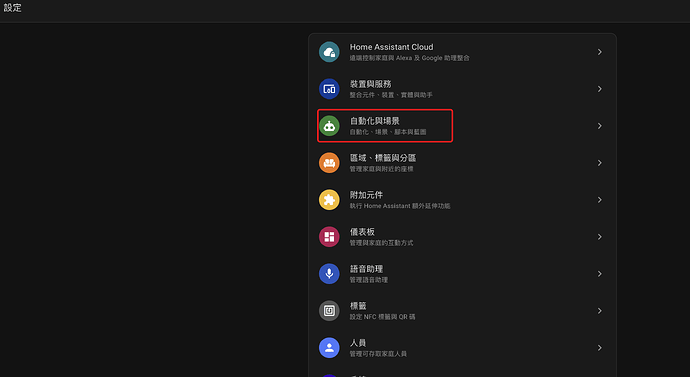
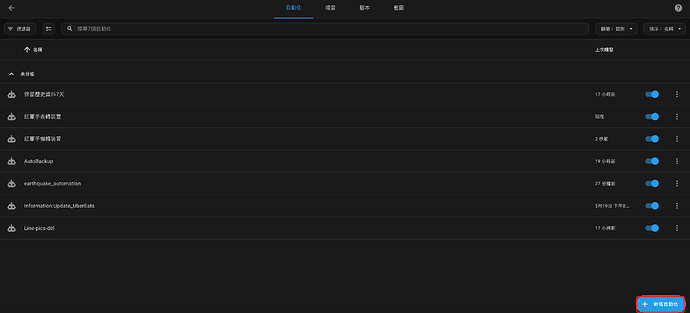
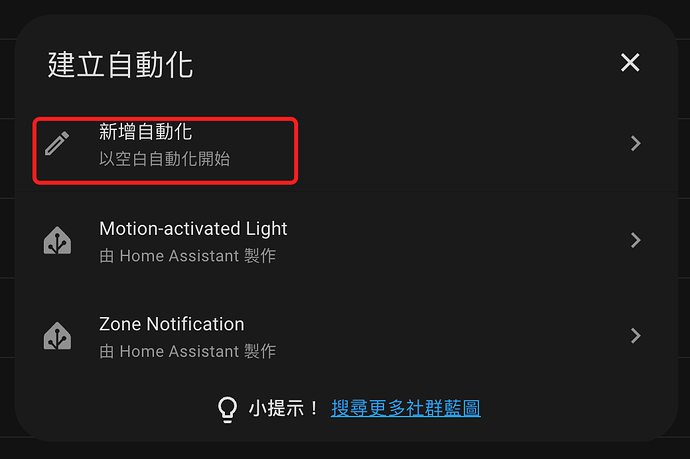
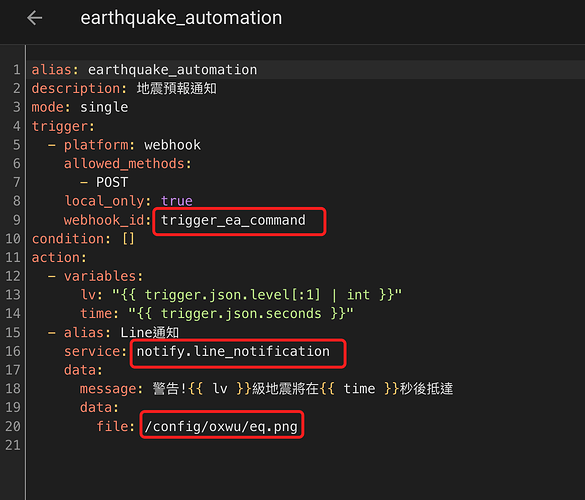
現在到 設定 自動化與場景 新增一個自動化
點擊右上角選以YAML編輯
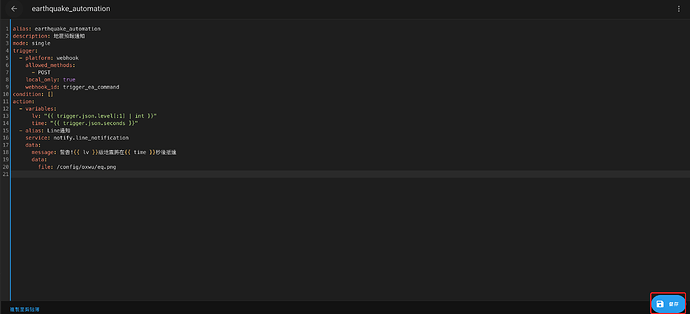
將下列內容複製貼上然後存擋
alias: earthquake_automation
description: 地震預報通知
mode: single
trigger:
  - platform: webhook
    allowed_methods:
      - POST
    local_only: true
    webhook_id: trigger_ea_command
condition: []
action:
  - variables:
      lv: "{{ trigger.json.level[:1] | int }}"
      time: "{{ trigger.json.seconds }}"
  - alias: Line通知
    service: notify.line_notification
    data:
      message: 警告!{{ lv }}級地震將在{{ time }}秒後抵達
      data:
        file: /config/oxwu/eq.png
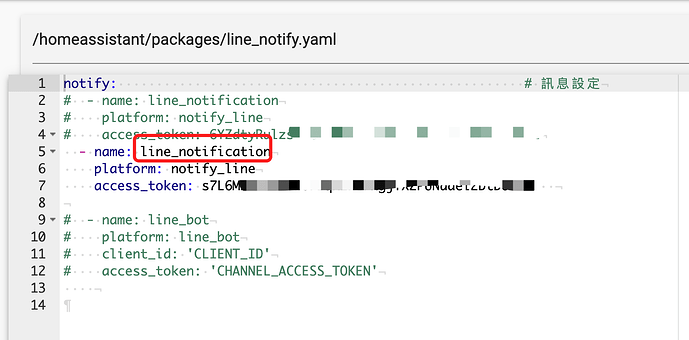
注意這邊Line用的是HACS的Line notify
不知道怎麼安裝的請參考
這篇的前半段安裝設定
要注意 webhook_id file 這兩個地方的設定要與剛剛在 notify.sh 裡面的一樣
service 要與你HACS Line notify的一樣
上面設定完成後
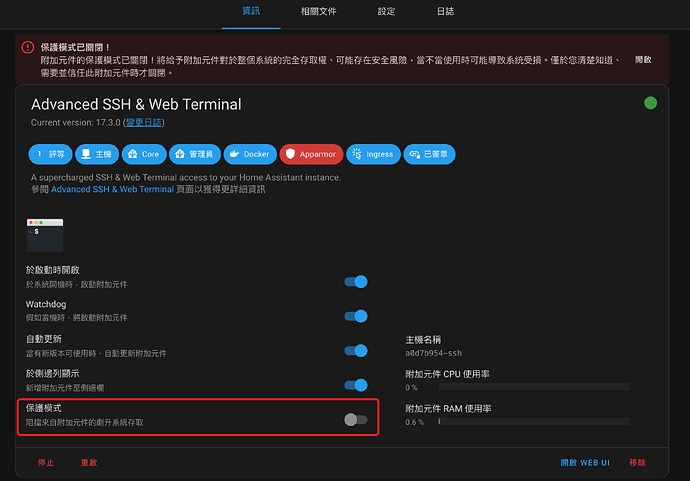
打開 Advanced SSH & Web Terminal
保護模式記得要關掉
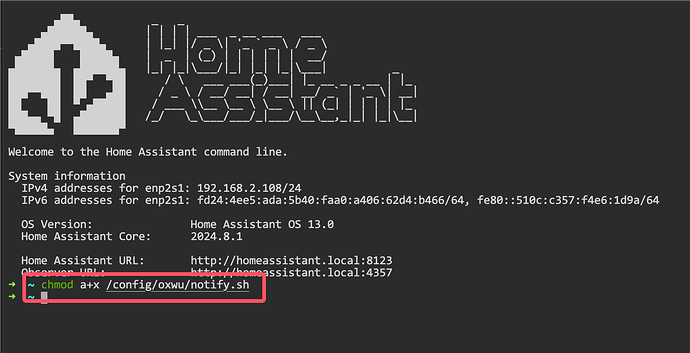
輸入
chmod a+x /config/oxwu/notify.sh
到這邊設定完成就可以去啟動oxwu地牛了
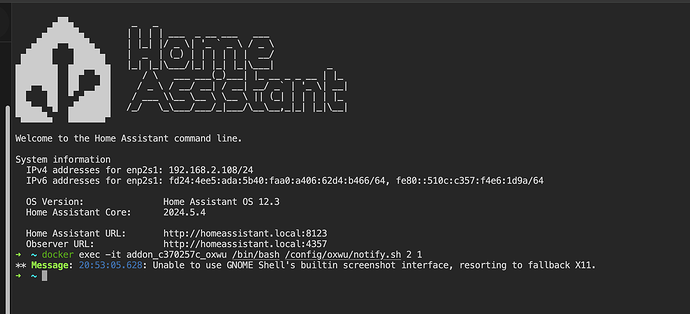
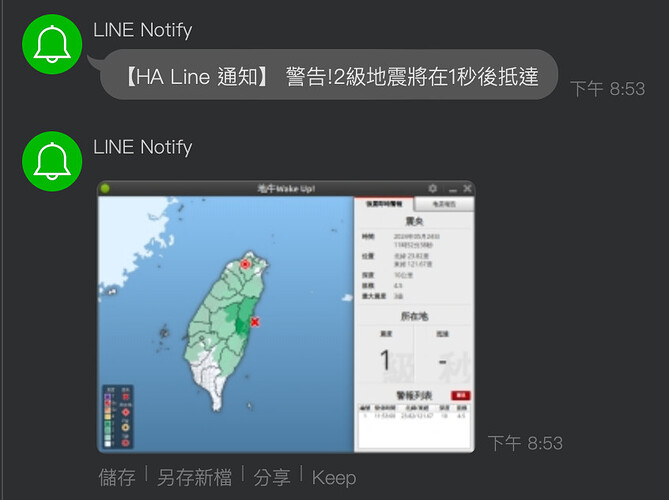
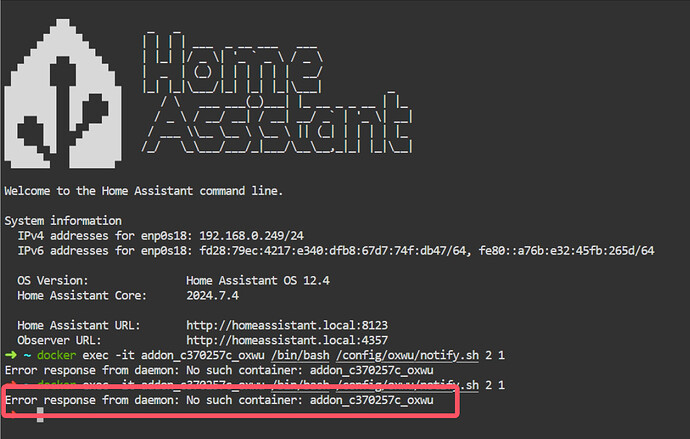
啟動好地牛就可以在 Advanced SSH & Web Terminal 下指令測試
docker exec -it addon_c370257c_oxwu /bin/bash /config/oxwu/notify.sh 2 1
notify.sh 2 1代表的是 2級 1秒後抵達
修改了一下改成NR能用的方式
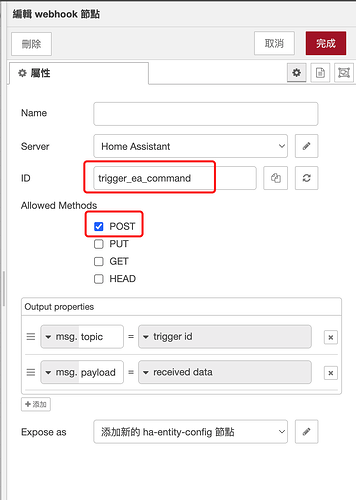
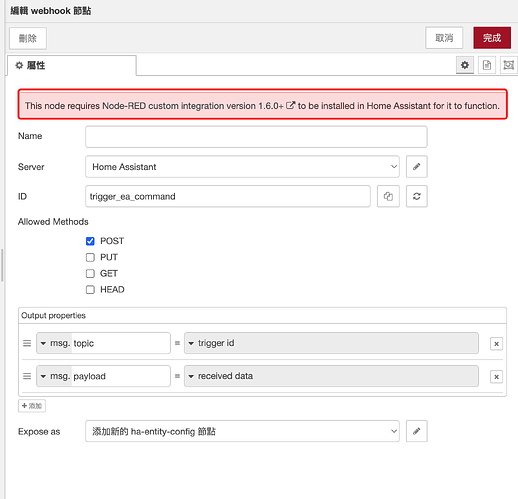
使用webhook節點
ID參考上面設定notify.sh時的 設定
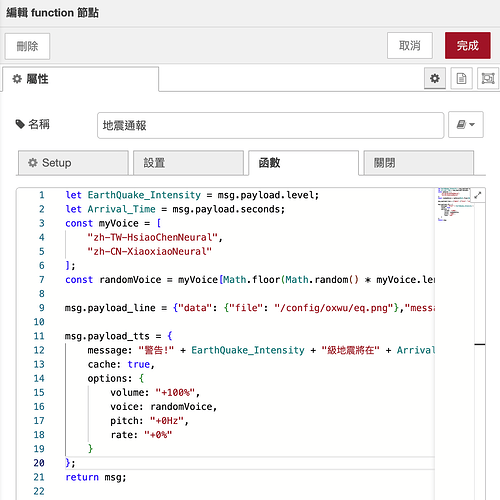
Function內容
let EarthQuake_Intensity = msg.payload.level;
let Arrival_Time = msg.payload.seconds;
const myVoice = [
    "zh-TW-HsiaoChenNeural",
    "zh-CN-XiaoxiaoNeural"
];
const randomVoice = myVoice[Math.floor(Math.random() * myVoice.length)];

msg.payload_line = {"data": {"file": "/config/oxwu/eq.png"},"message": "警告!" + EarthQuake_Intensity + "級地震將在"+Arrival_Time+"秒後抵達"};

msg.payload_tts = {
    message: "警告!" + EarthQuake_Intensity + "級地震將在" + Arrival_Time + "秒後抵達",
    cache: true,
    options: {
        volume: "+100%",
        voice: randomVoice,
        pitch: "+0Hz",
        rate: "+0%"
    }
};
return msg;
直接複製貼上就好不需要修改(檔案位置如果跟我上面不一樣的需要更改位置跟檔名)
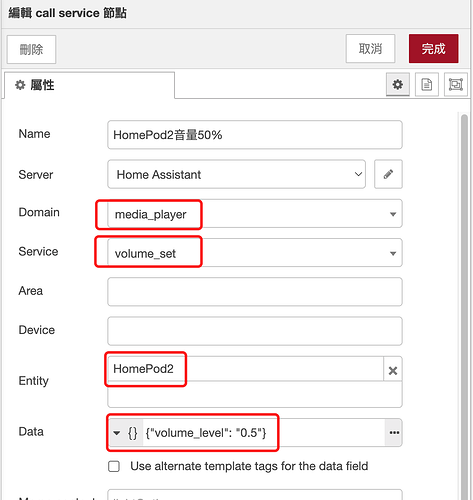
修改音量設定
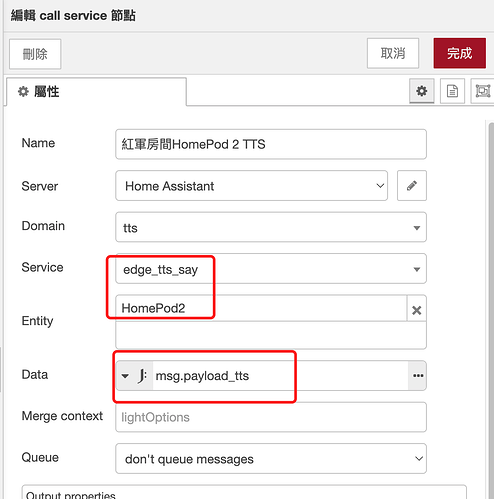
播放語音
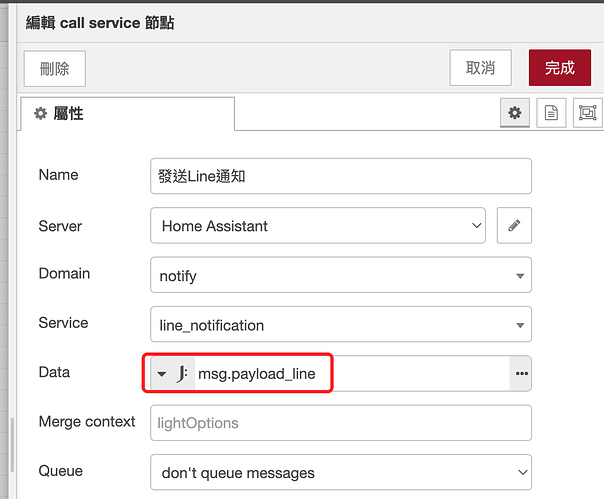
發送Line通知
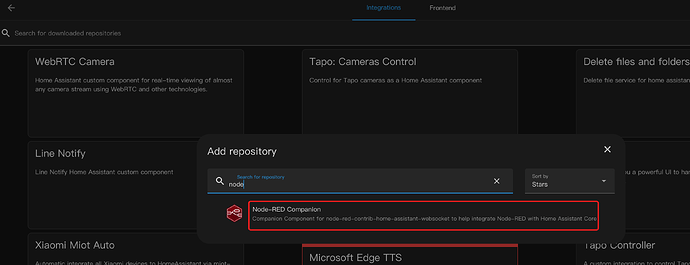
如果webhook出現這個訊息那是因為缺少 Node-RED Companion
到HACS搜尋Node-RED Companion安裝並重開HA
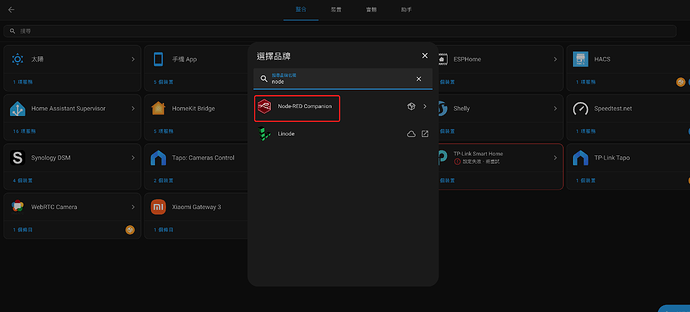
重開完後到整合新增Node-RED Companion就可以正常使用webhook節點
以上本次簡單分享設定方式
有問題不要問我 Docker我不熟我都只是照抄而已
